Tilda
What is Tilda?
Tilda is a no-code website builder that allows users to create visually appealing and responsive websites without needing to write code. It is particularly known for its design-focused approach, making it a favorite among creatives, designers, and marketers.
🔍 Key Features of Tilda:
- Block-Based Editor: Uses a library of over 550 pre-designed content blocks for layout creation.
- Zero Block Editor: A custom design tool within Tilda for pixel-perfect, fully customizable designs.
- Responsive Design: Automatically adapts to different screen sizes (desktop, tablet, mobile).
- Integrations: Supports third-party tools like Google Analytics, Mailchimp, Zapier, CRM systems, etc.
- eCommerce Support: Allows product listings, shopping cart functionality, and payment gateways.
- SEO Tools: Built-in tools for search engine optimization, including metadata editing and fast page speed.
- Forms and Data Collection: Easily collect user data with forms connected to Google Sheets or email.
- Export Code: Pro users can export clean HTML/CSS/JS files for hosting elsewhere.
🎯 Best For:
- Designers who want creative freedom without coding.
- Startups needing fast and elegant landing pages.
- Agencies looking to build prototypes or live sites quickly.
- Portfolio and personal websites.
Embbeding your Blubuddy Widgets on your Tilda Website
Step 1: Access Your Tilda Dashboard
- Visit https://tilda.cc/
- Sign up or log in using your credentials.
- After login, you’ll be directed to your dashboard.
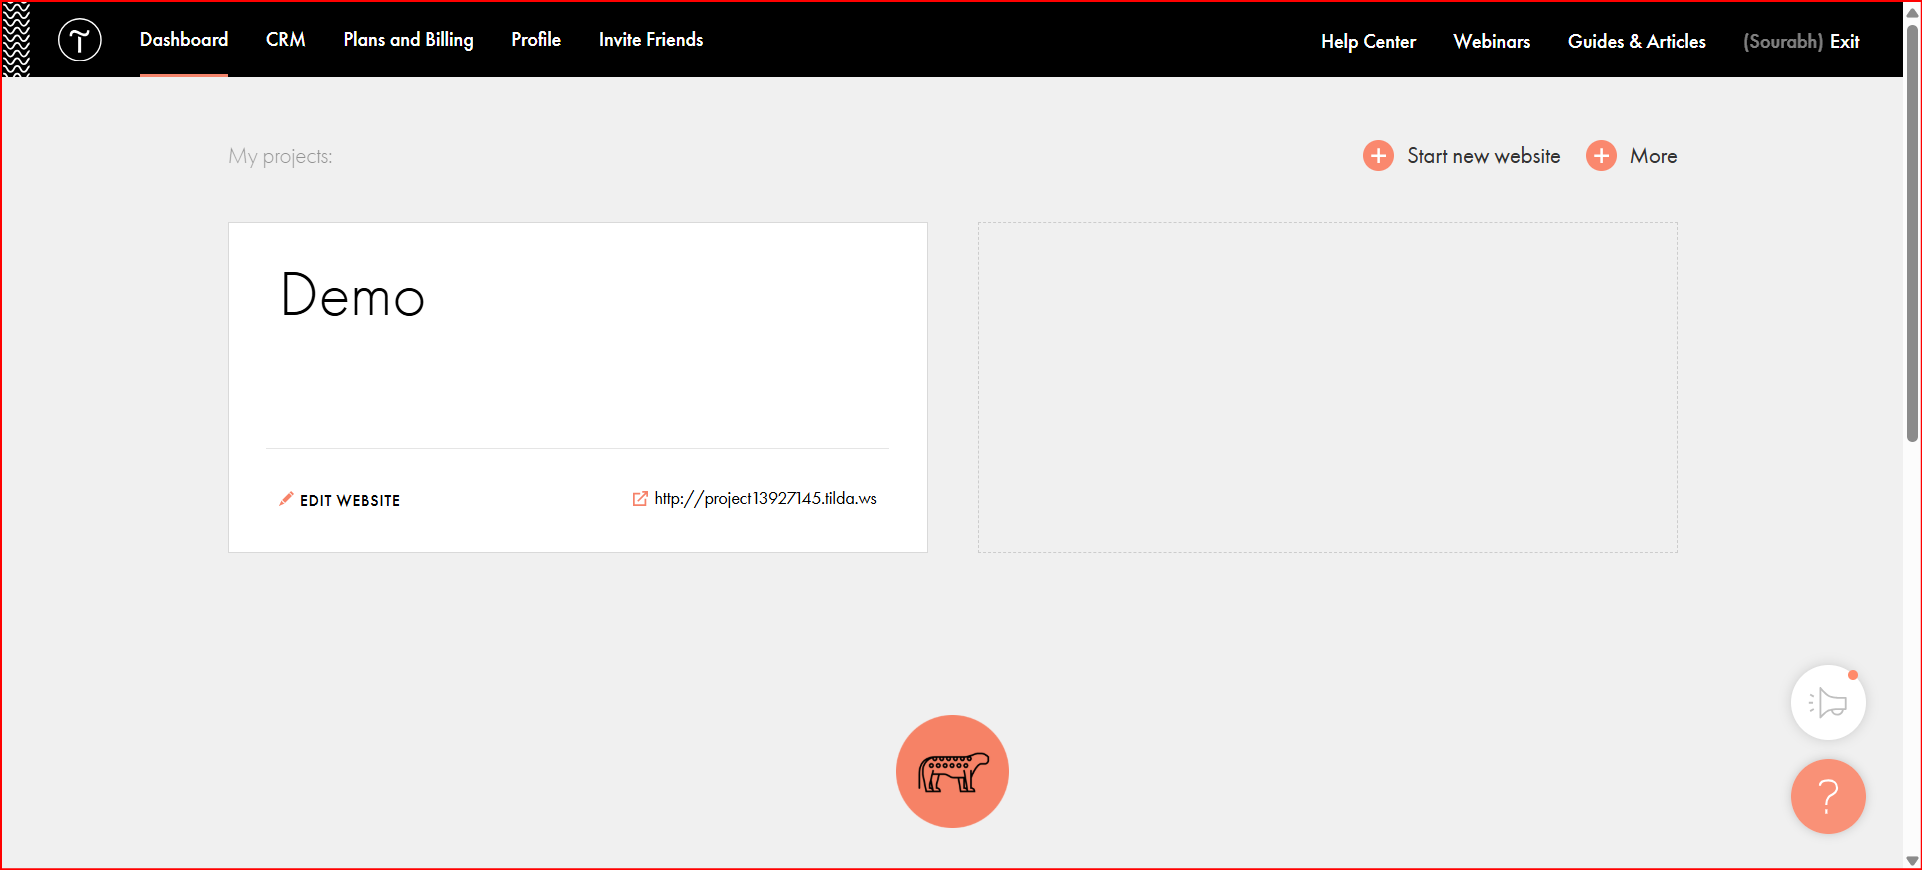
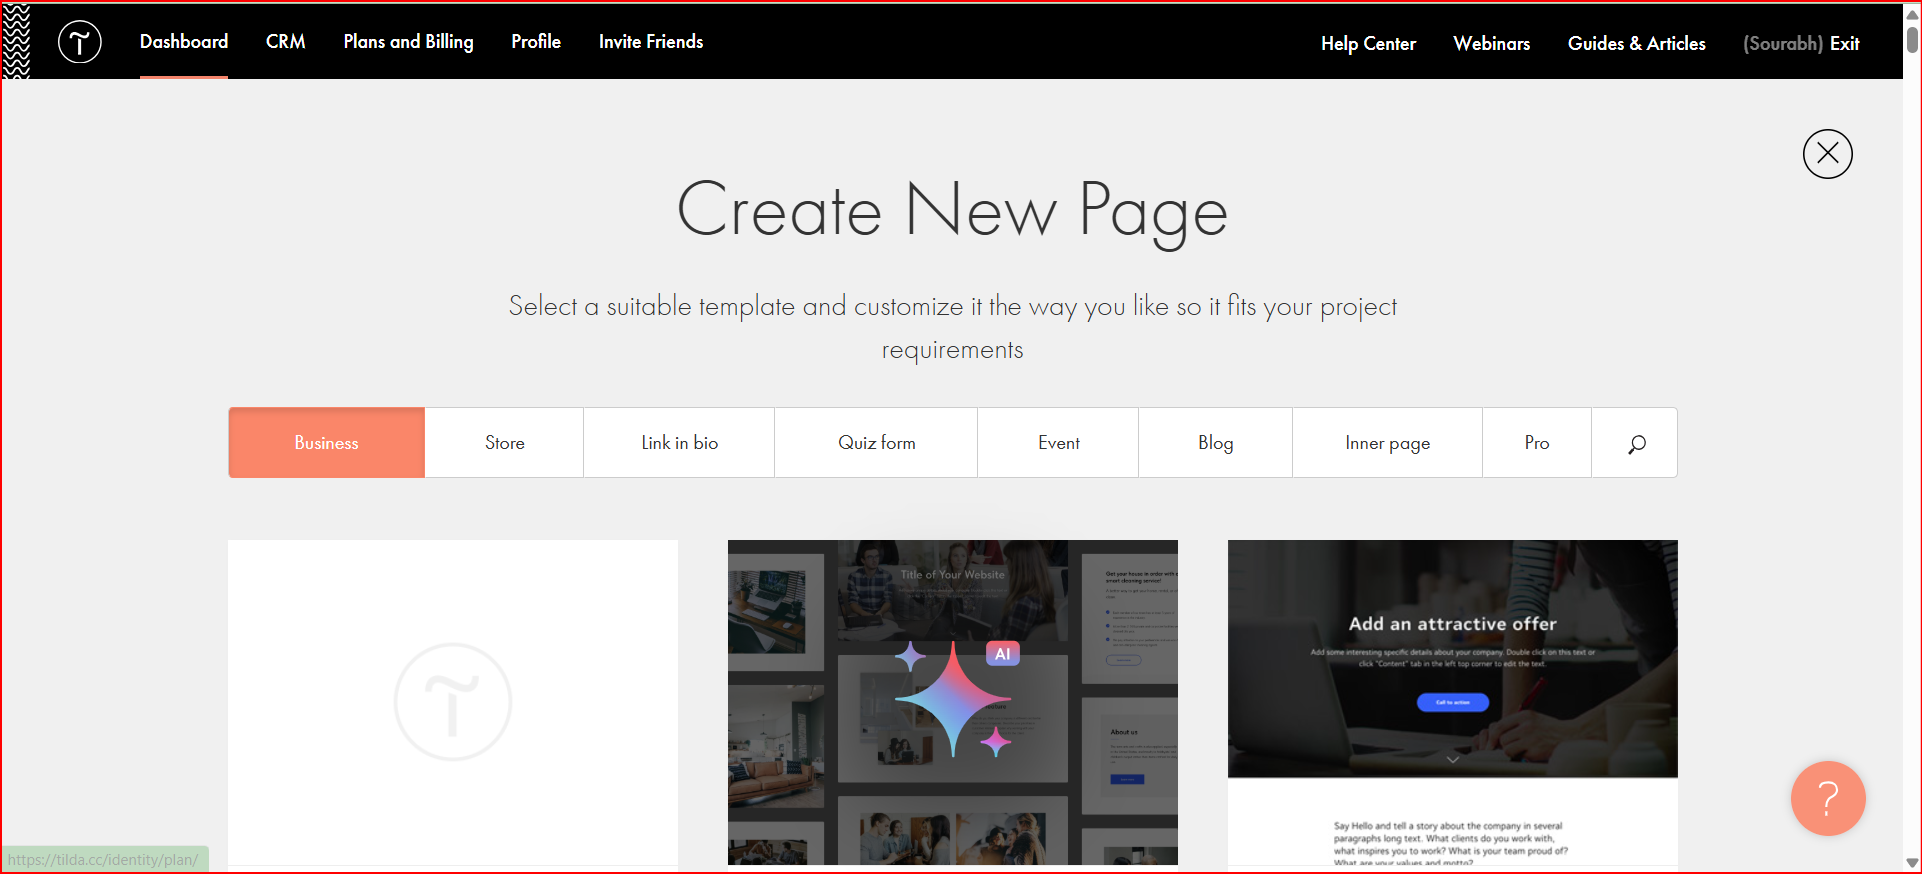
Step 2: Start a New Website
- From the dashboard, click on the “Start new Website” button located at the top-right corner.
- Choose a template or start from scratch.
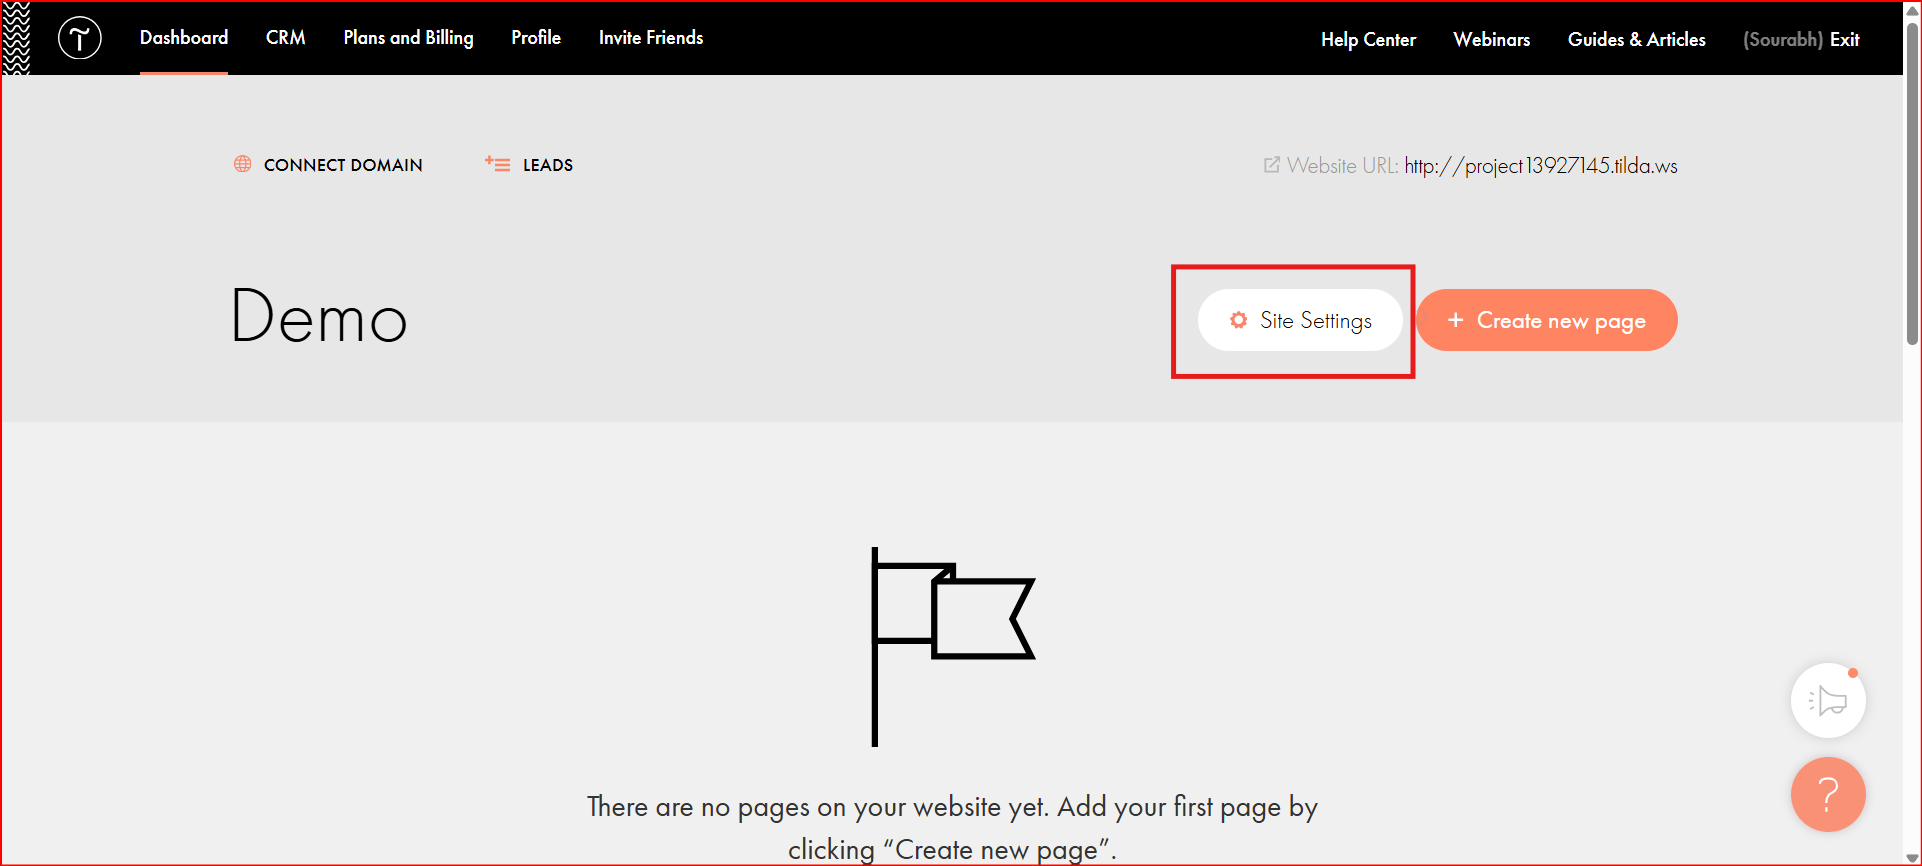
Step 3: Open Site Settings
- Once inside the website builder canvas, click on “Site Settings” to access configuration options.
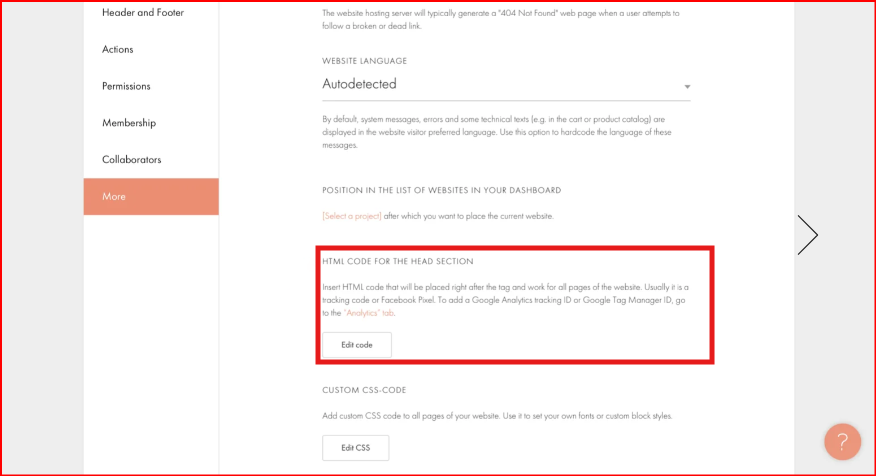
Step 4: Navigate to Code Settings
- In the left-hand sidebar, scroll down and click on “More” to expand additional settings.
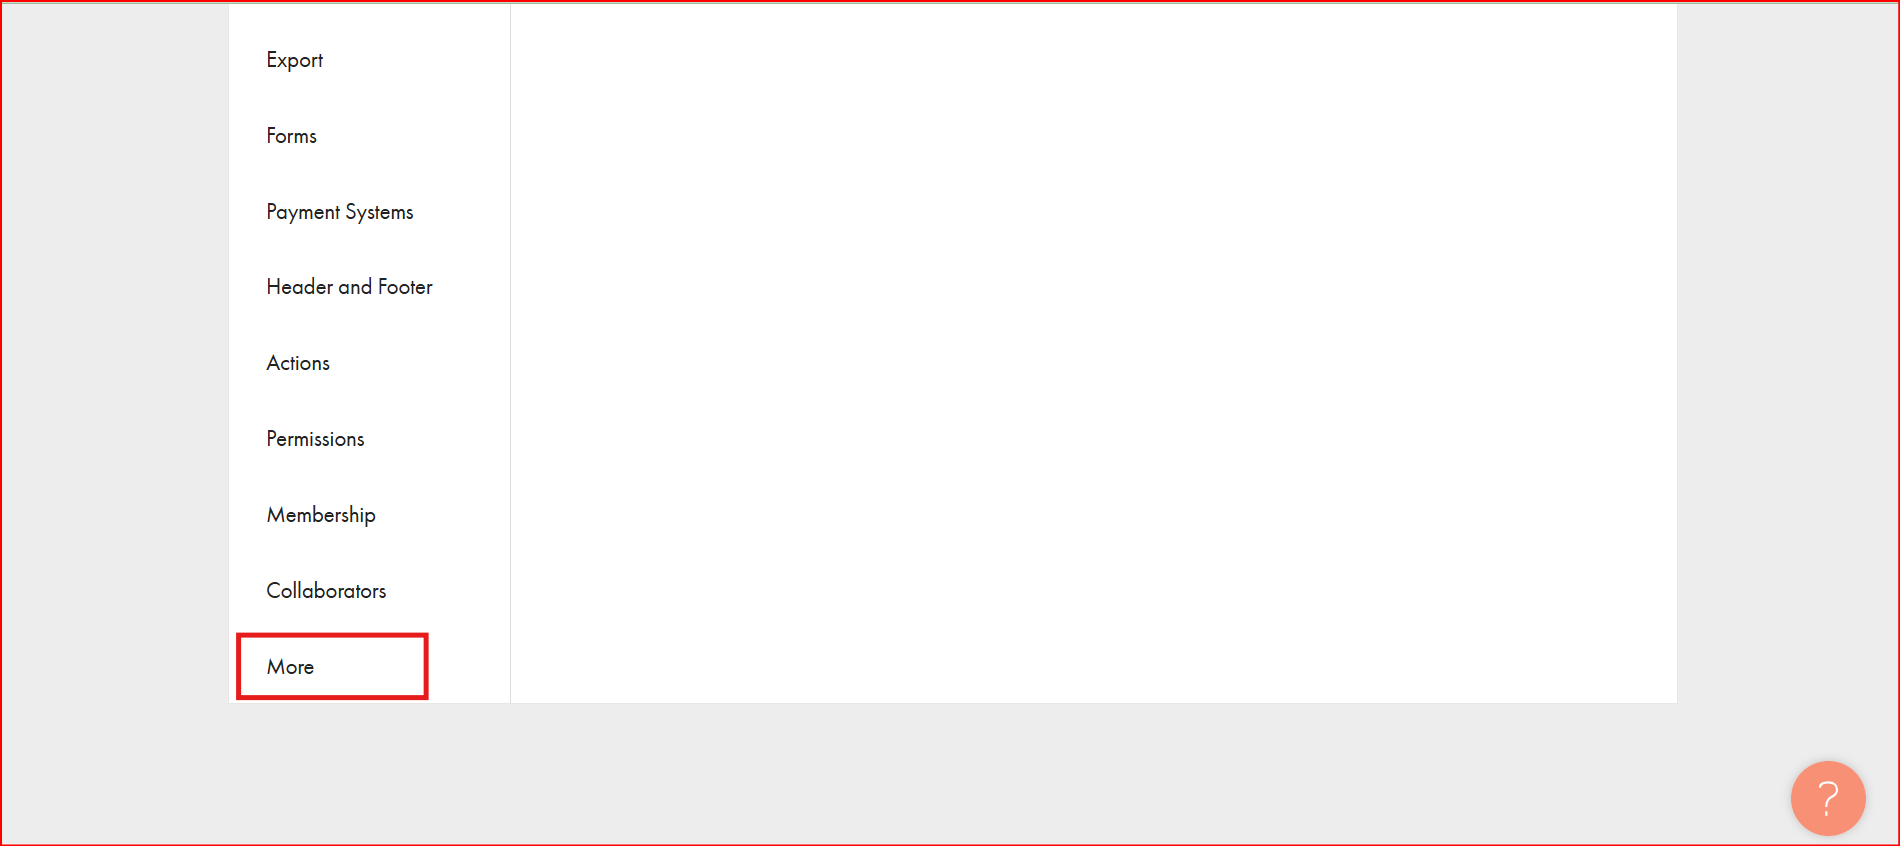
- Select “Edit Code” under the HTML Code for the HEAD Section.
Step 5: Insert Custom Code
- Click on the “Edit Code” button.
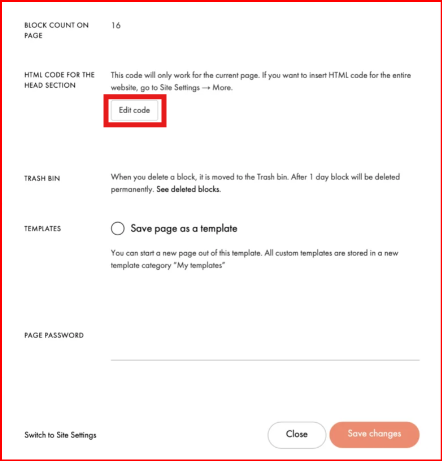
- Paste your BluBuddy widget or custom HTML/JS code snippet into the provided text box.
- After pasting your code, click the “Save and Close” button to store the changes.
// Example
 <div id="chatbot" botId="YOUR_CHATBOT_ID"></div>
 <script defer src="https://cdn.jsdelivr.net/gh/atozdebug/chatbot-widget@latest/index.js" type="module"></script>
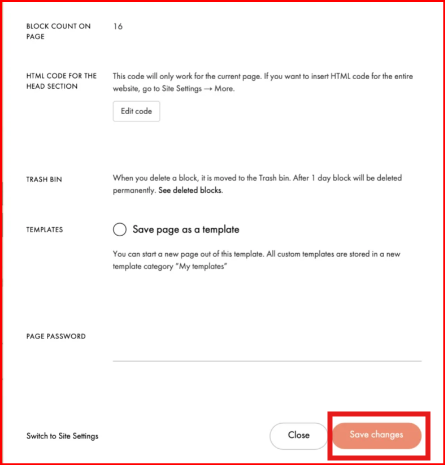
Step 6: Apply Site-Wide Changes
- Now click on the “Save Changes” button to ensure all settings are updated.
Step 7: Publish Your Site
- Finally, click the “Publish” button to make your site live.
- Visit your published site to confirm the widget appears and functions as expected.
✅ Final Notes:
- Ensure your code is well-formatted and complete before publishing.
- If your widget does not appear, clear your browser cache or try in incognito mode.
Having Trouble? Let's Troubleshoot!
If your BluBuddy chatbot isn’t appearing or functioning properly on your Tilda website, try these quick fixes:
- Check Code Placement: Ensure the chatbot script is correctly pasted in Tilda as per directions above.
- Verify Installation Code: Ensure that the "Update" button was pushed when the bot was being installed on Tilda.
- Clear Cache & Refresh: Clear browser cache and refresh your website. Try opening it in Incognito Mode.
If everything is correct and you are still unable to move forward, write to us at hello@blubuddy.io Our Team will reach out to you as soon as possible for troubleshooting your problem.