Setup BluBuddy Chatbot
Set Up your BluBuddy Widgets
This guide will walk you through the step-by-step process of installing the BluBuddy chatbot widget.
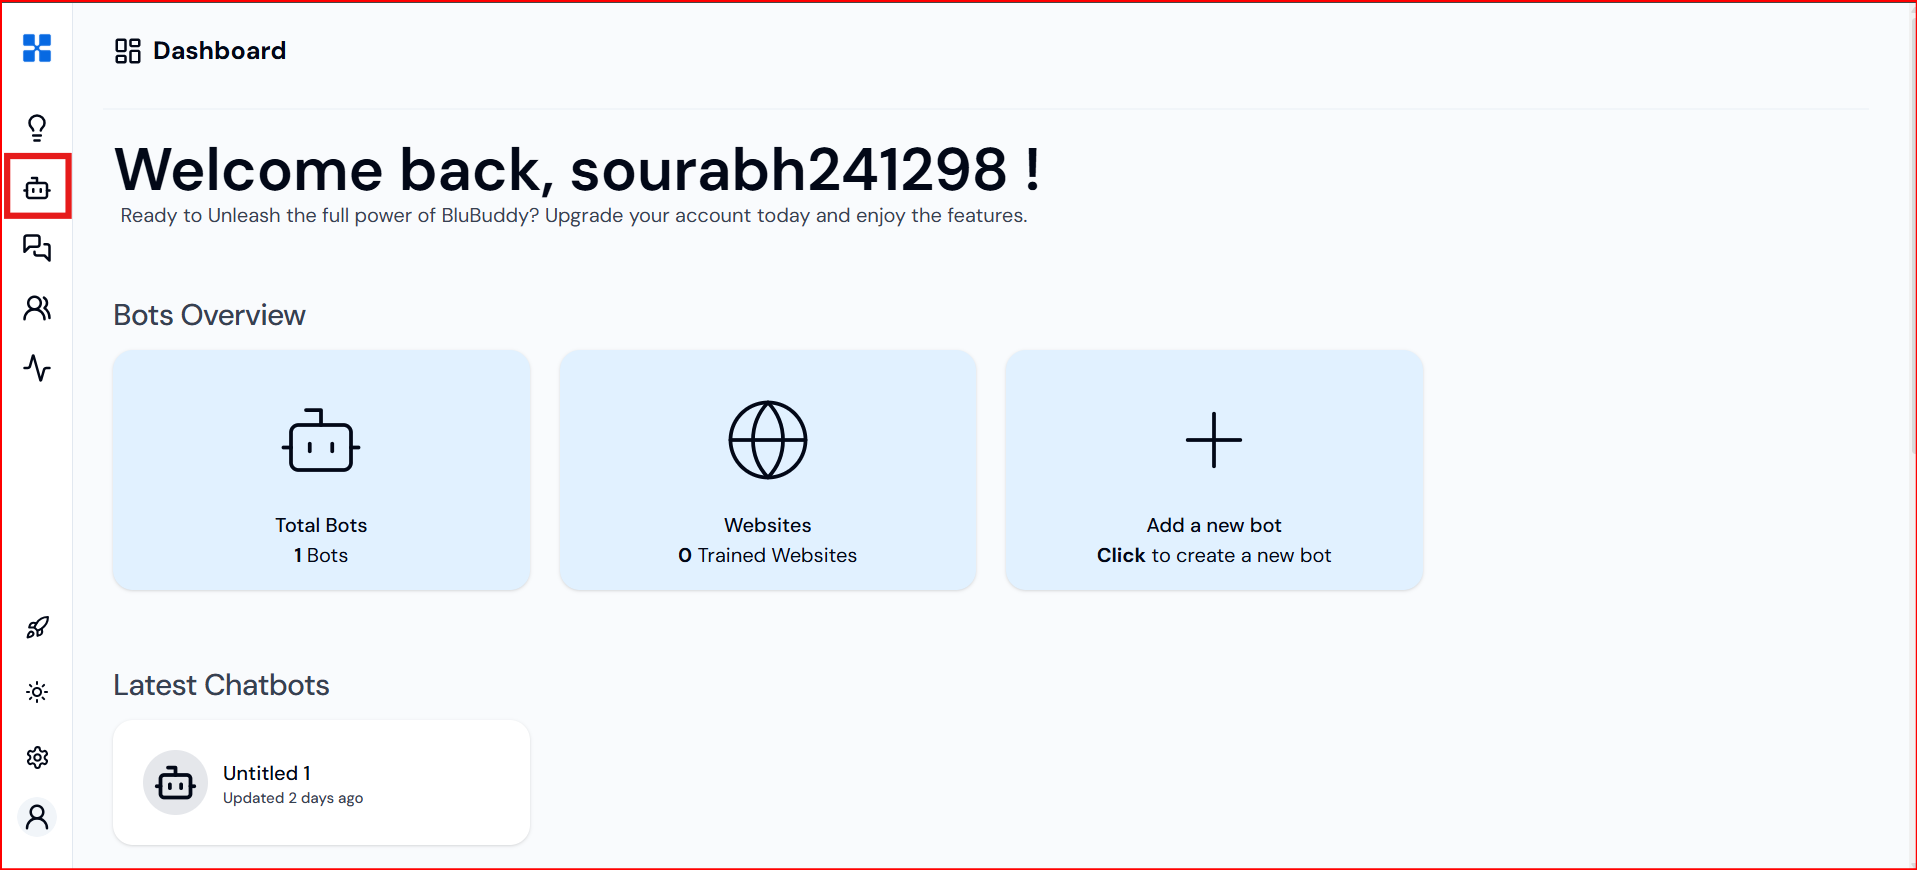
Step 1: Access BluBuddy Dashboard

Step 2: Build Your Chatbot
- Click on "Build Chat-bot" from the navigation bar.
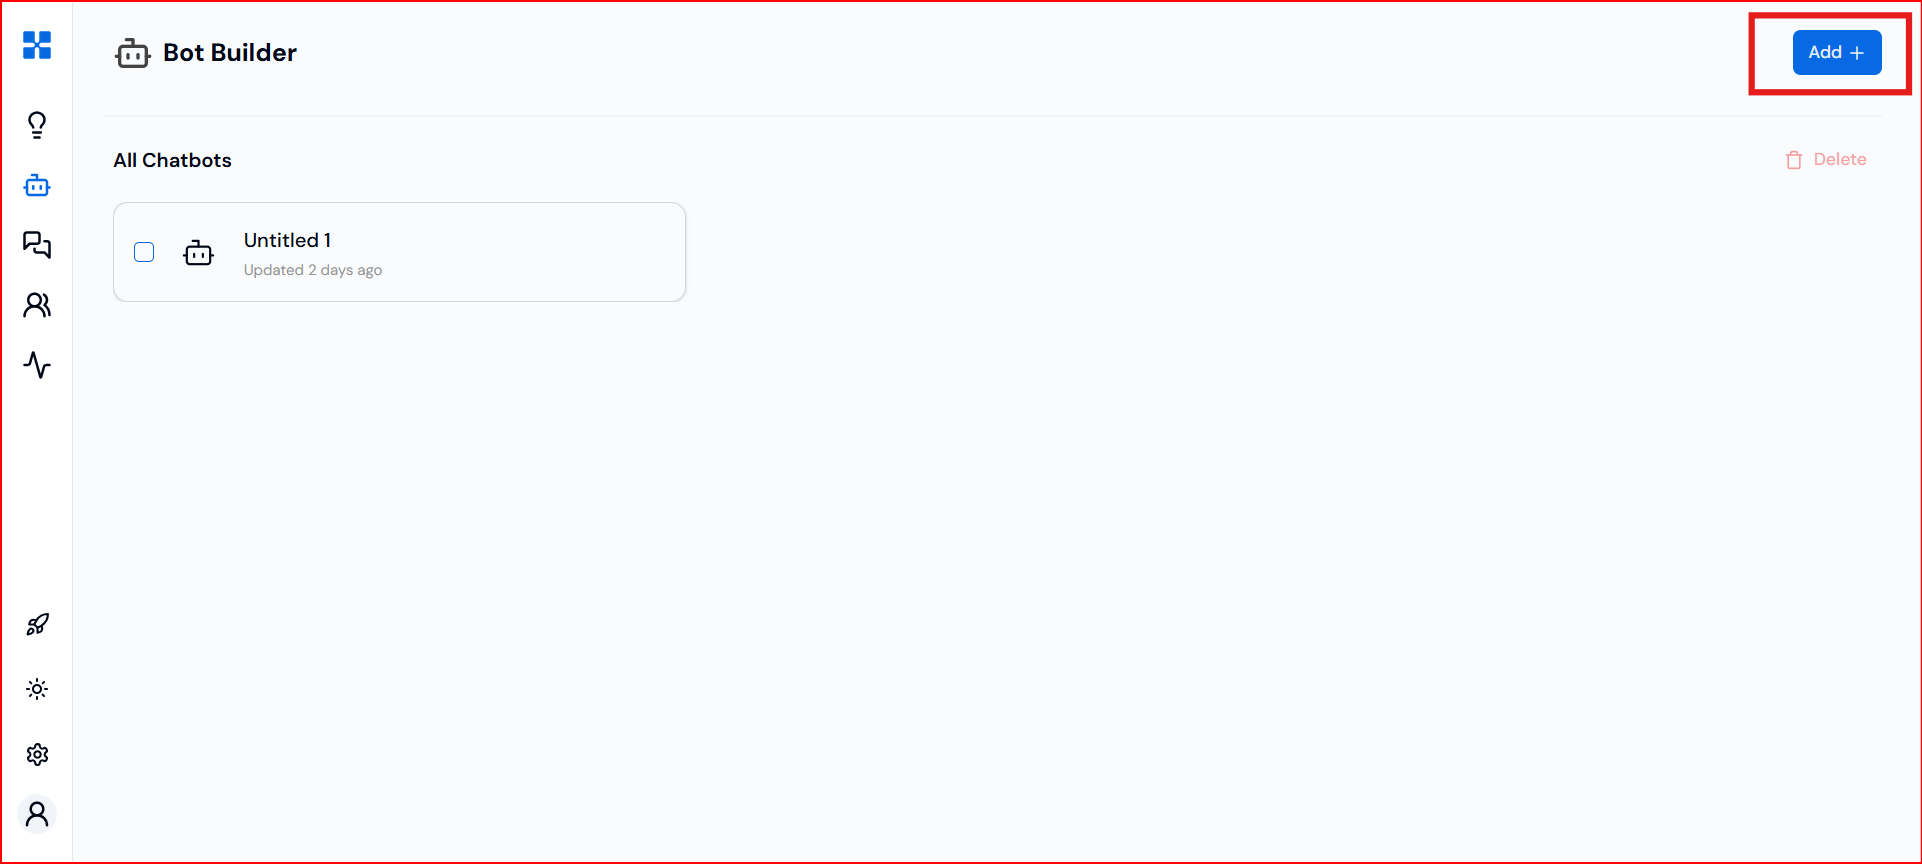
- Then, click on the "+" (Add) button at the top-right corner to create a new chatbot.
Step 3: Customize Your Chatbot
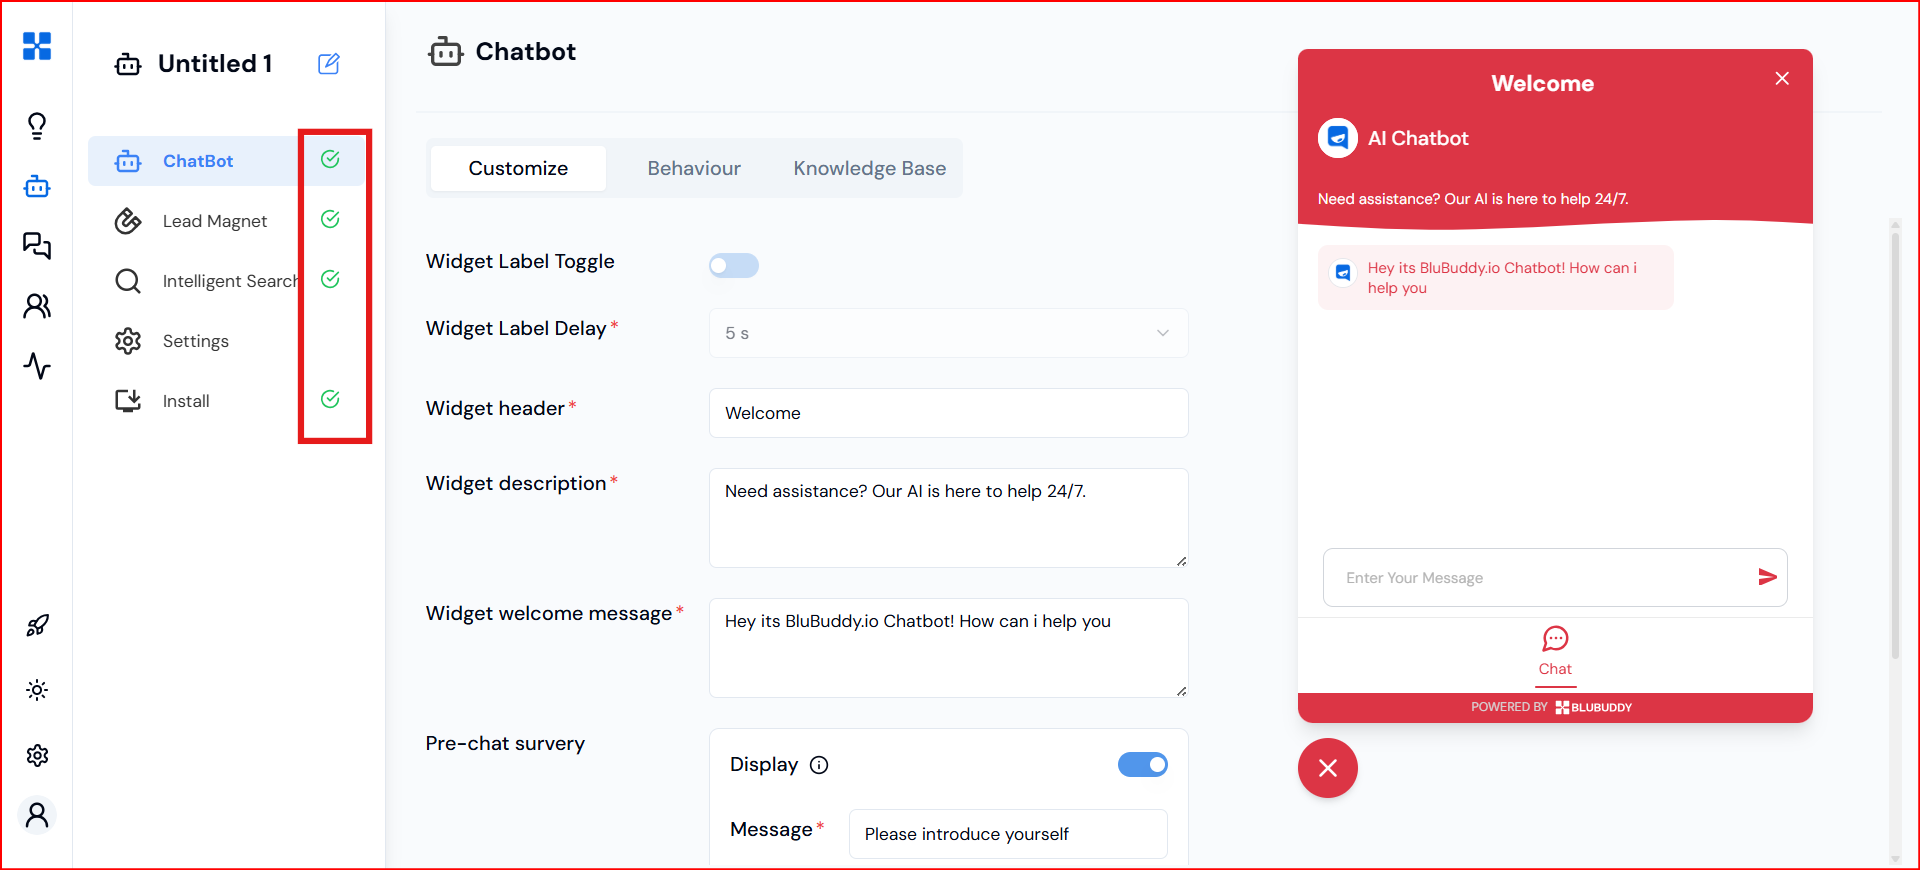
- Click on the newly created chatbot from the Bot Builder section of the dashboard.

- You’ll be directed to the customization page.
Step 4: Add Knowledge Base
In this section, configure your chatbot’s content:
- Choose from: Websites, Documents, or FAQ.
- Complete the setup by selecting your desired content type.
- Once each section is configured, you’ll see a green checkmark in the left-hand panel.
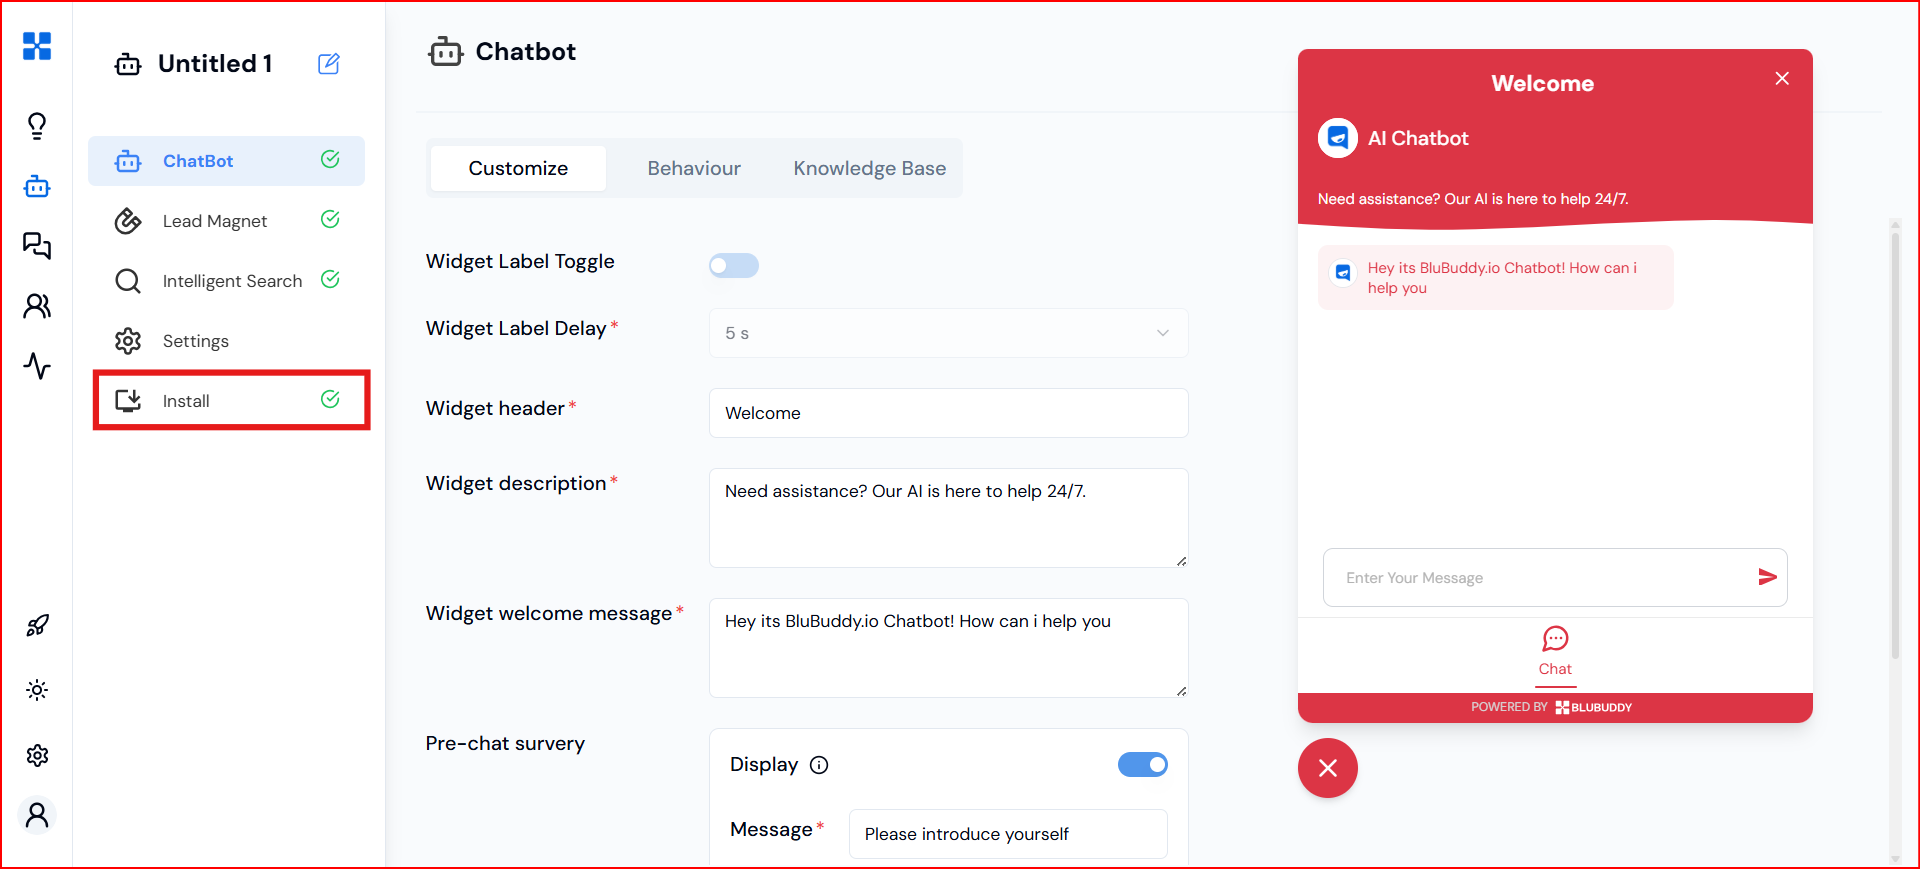
Step 5: Navigate to Installation Settings
- Scroll to the end of the left panel and click on the "Install" section.
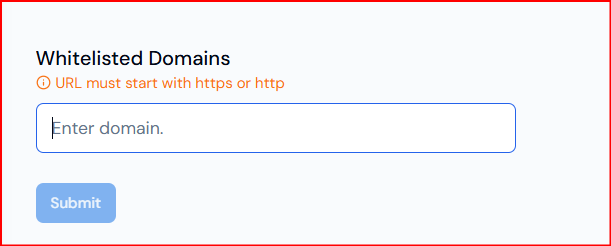
Step 6: Add Whitelisted Domains
- Enter your website’s URL in the Whitelisted Domains. You can add Multiple domains using the plus icon appear on the right side of the text box
Step 7: Copy the Code Snippet
- Click the Copy icon next to your generated code snippet.
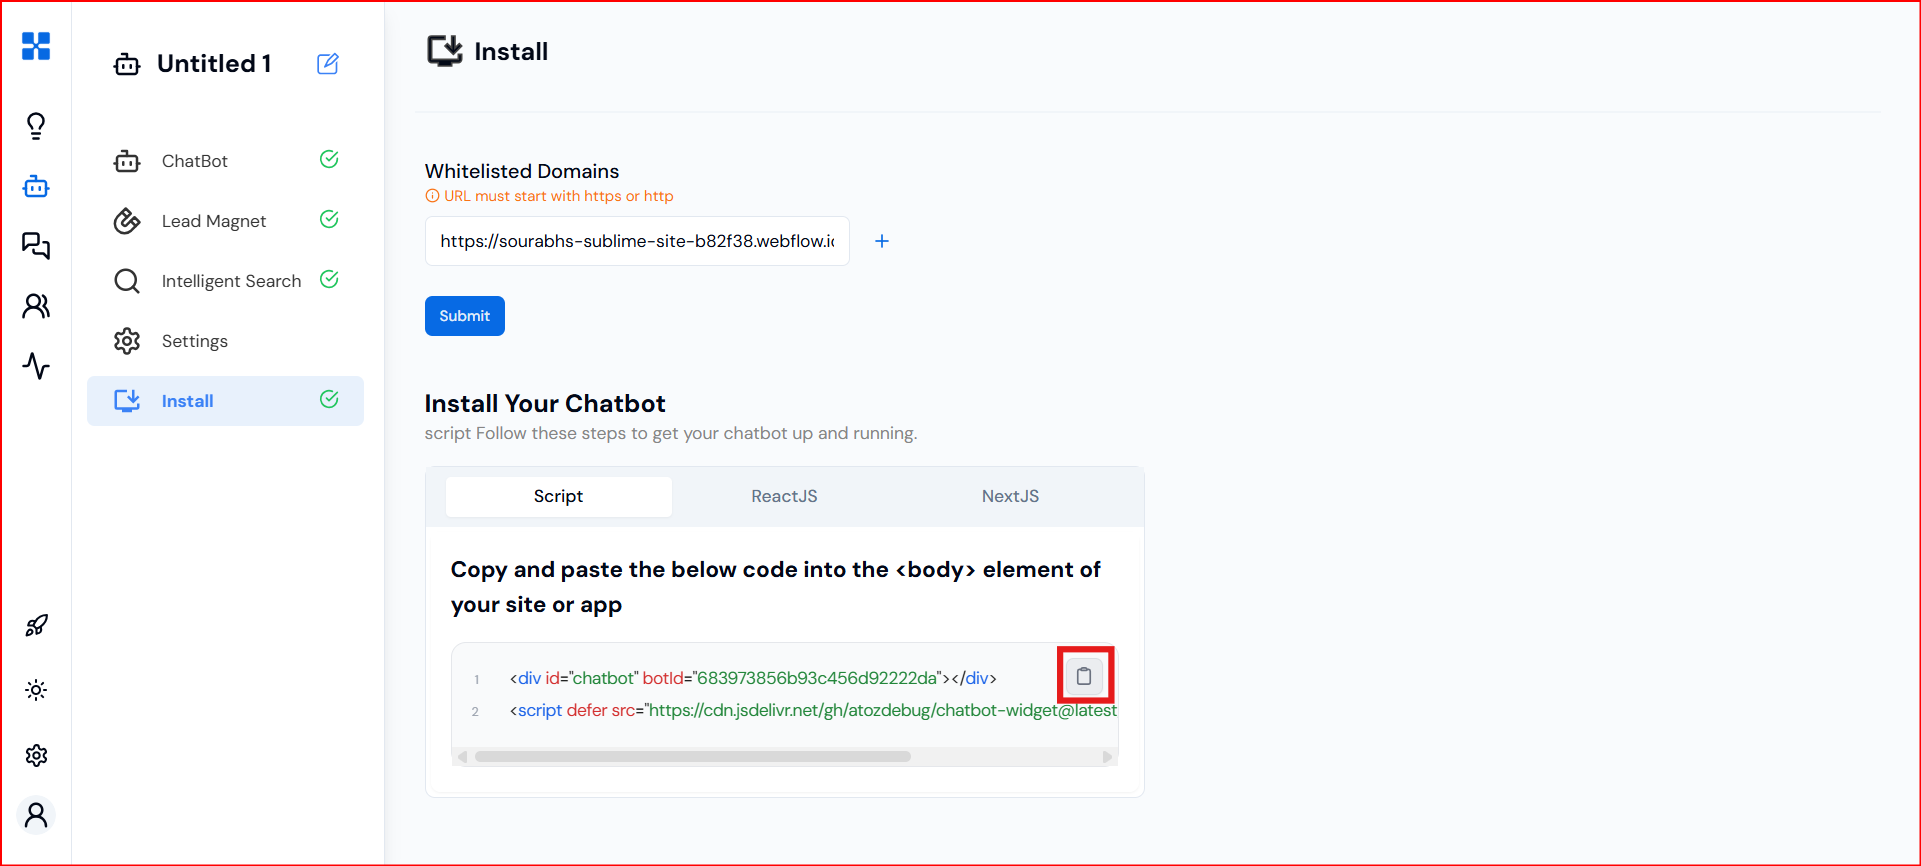
Installation Method 1:
- If you're not using a framework like React or Next.js, copy the HTML script and paste it inside the "body" tag of your website’s HTML.
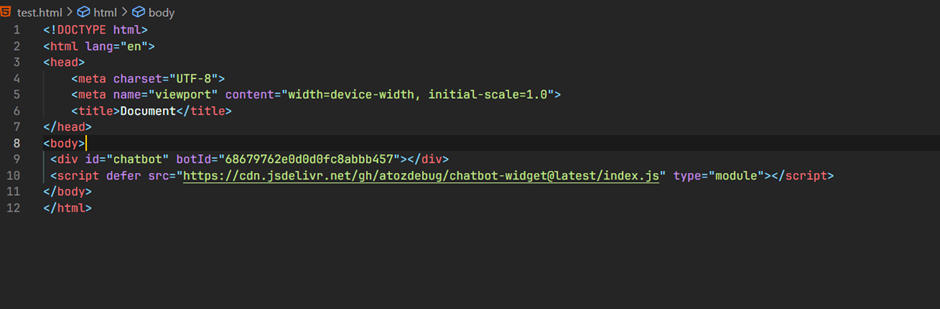
That’s it! Your chatbot will now be live on your domain.
Installation Method 2:
For React and Next.js, the installation process is similar.
For React, you need to install the package “@blubuddy.io/widget” by running the command:
npm install "@blubuddy.io/widget"
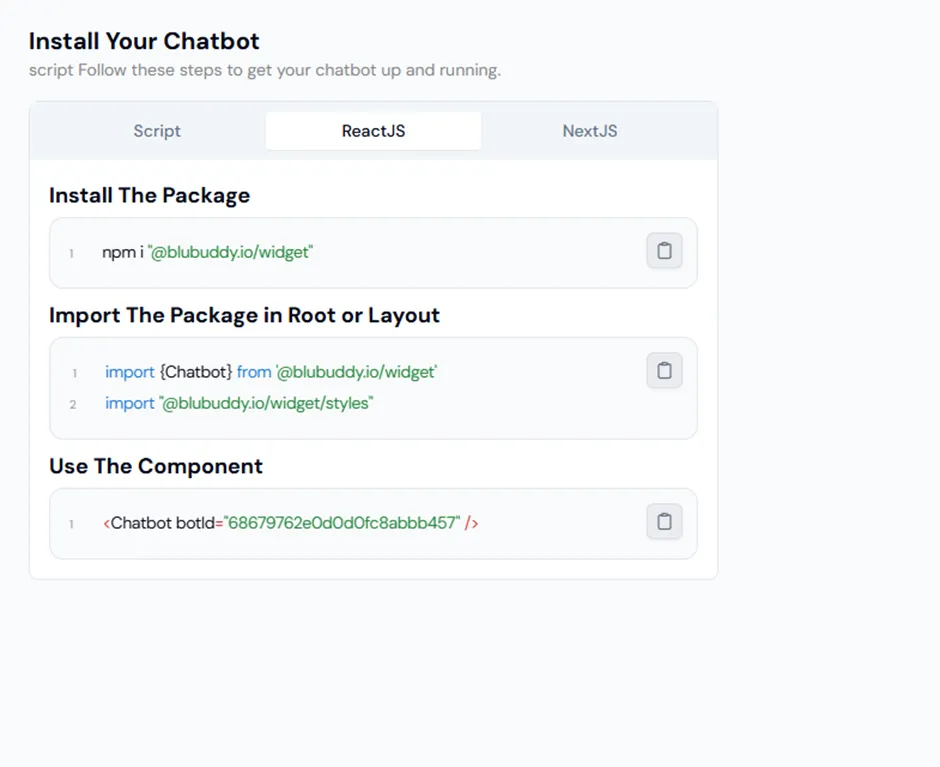
Next, import the package and styles wherever you want to use them on your site.
Example:
import { Chatbot } from "@blubuddy.io/widget";
import "@blubuddy.io/widget/styles";
function App() {
  return (
    <div className="h-full w-full">
      <Chatbot botId="YOUR_CHATBOT_ID" />
    </div>
  );
}
export default App;
And for Next.js applications, it’s similar to react.js. First You need to install the package @blubuddy.io/widget by running the command:
npm install “@blubuddy.io/widget”
Since we're using a client-side component (widget), we need to include 'use client' at the top. After that, we can proceed with the usual implementation steps.
Example:
// src/app/ChatbotComponent.tsx
"use client";
import { Chatbot } from "@blubuddy.io/widget";
import "@blubuddy.io/widget/styles";

const ChatbotComponent = () => {
  return <Chatbot botId="YOUR_CHATBOT_ID" />;
};
export default ChatbotComponent;
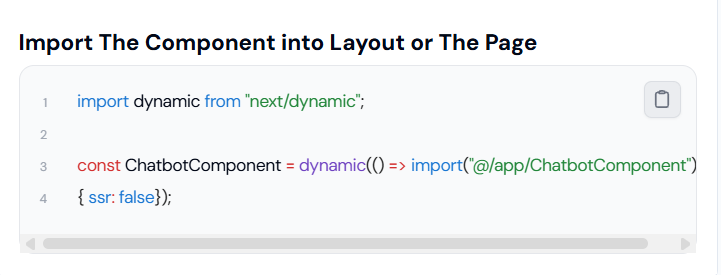
Alternatively, we can import the component dynamically using Next.js dynamic import:
// src/app/layout.tsx
import dynamic from "next/dynamic";

const ChatbotComponent = dynamic(() => import("@/app/ChatbotComponent"), {
  ssr: false,
});
This is the script that will be embedded into your No-code website Builder.
Having Trouble? Let's Troubleshoot!
If your BluBuddy chatbot isn’t appearing or functioning properly on your WordPress website, try these quick fixes:
- Check Code Placement: Ensure the chatbot script is correctly pasted in WordPress as per directions above.
- Verify Installation Code: Ensure that the "Update" button was pushed when the bot was being installed on WordPress.
- Clear Cache & Refresh: Clear browser cache and refresh your website. Try opening it in Incognito Mode.
If everything is correct and you are still unable to move forward, write to us at hello@blubuddy.io Our Team will reach out to you as soon as possible for troubleshooting your problem.